Onboarding producers
The Onboarding screen (sidebar → Onboarding) is where new producers enter the platform: you invite them, capture or review their application, and approve or reject it. Approval is what actually creates the producer record — there is deliberately no “New producer” button anywhere else.
The screen has two tabs — Applications and Invitations — with a search box in the header. The Applications tab shows four clickable KPI tiles — Needs review, Drafts, Approved, Rejected — that filter the table below them.
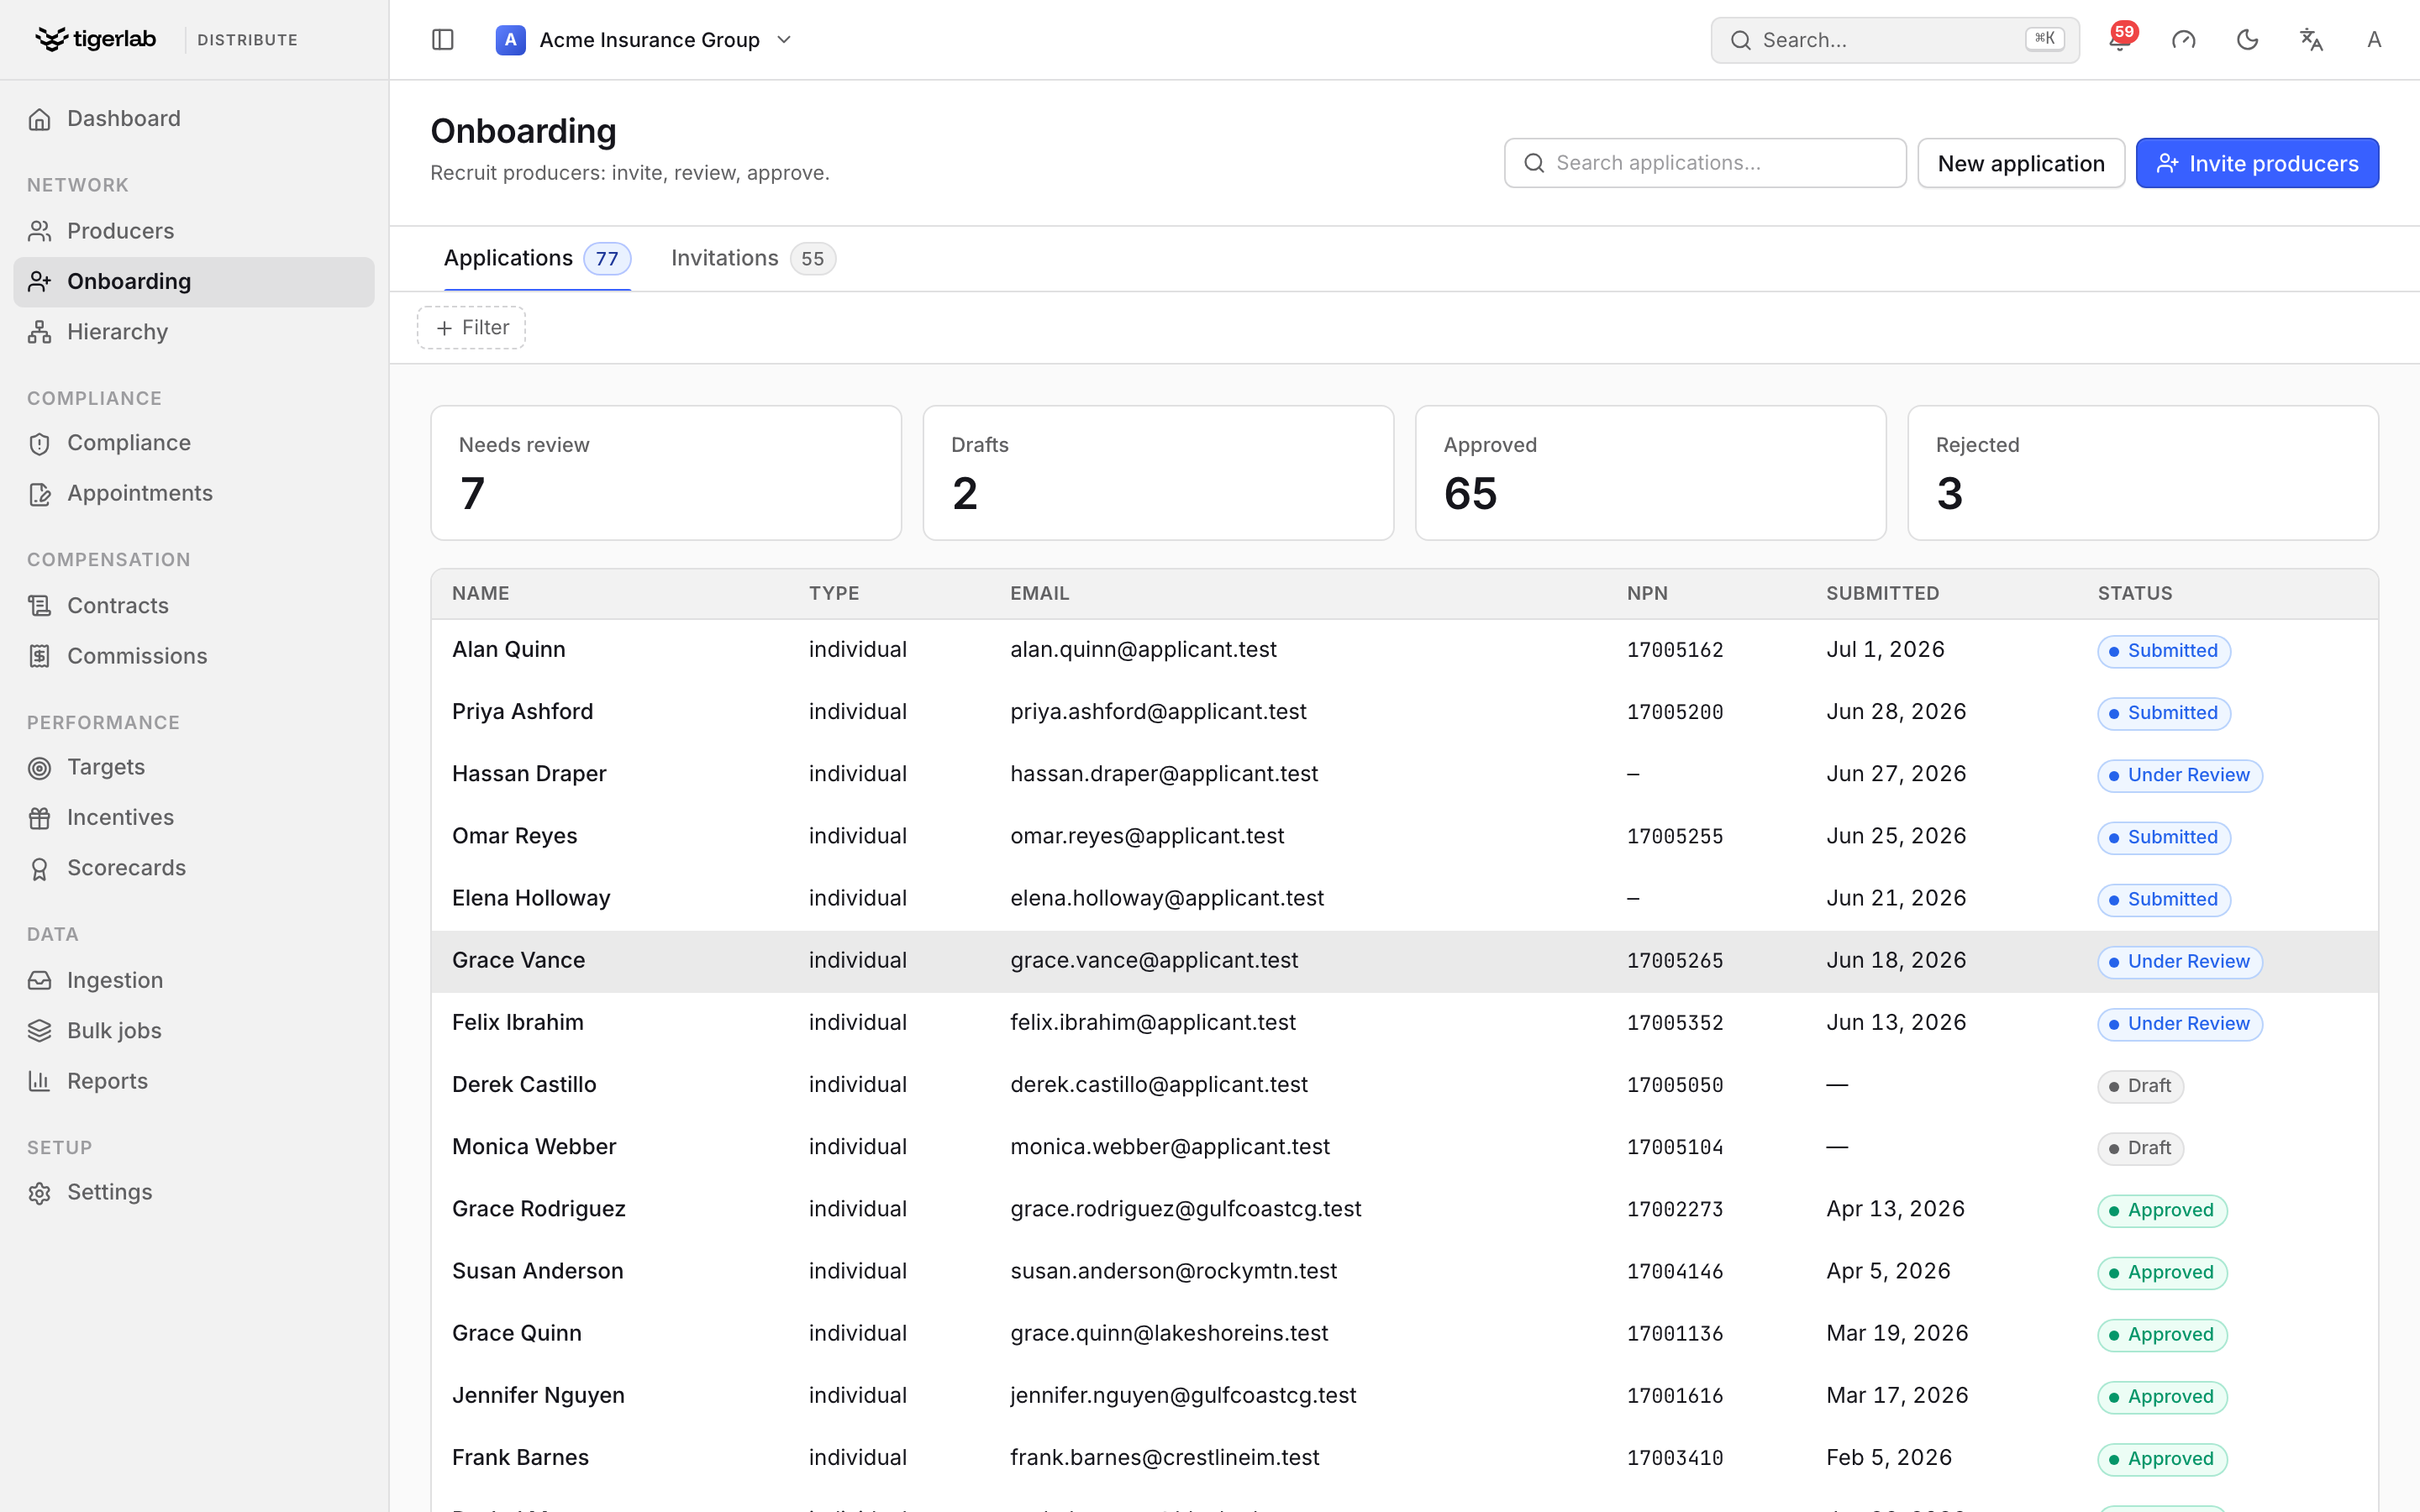
The Onboarding screen. The Applications tab lists applicants with their status; the KPI tiles filter the table, and the header carries the Invite producers and New application actions.
The onboarding flow at a glance
Invitation (pending) ──accepted──▶ Application (draft)
                                       │ submit
                                       ▼
                                  submitted / under review
                                  │                    │
                               approve               reject
                                  │                    │
                                  ▼                    ▼
     Producer provisioned (active)  +           rejected (with reason)
     License (if supplied) + E&O (if supplied)
Step 1 — Invite producers
Click Invite producers.
In the dialog, enter one or many email addresses — paste a comma- or newline-separated list and each address becomes a chip. Pick the Invitee type (Individual or Agency, default Individual) and optionally the Jurisdiction you are recruiting for.
Click Create N invitations.
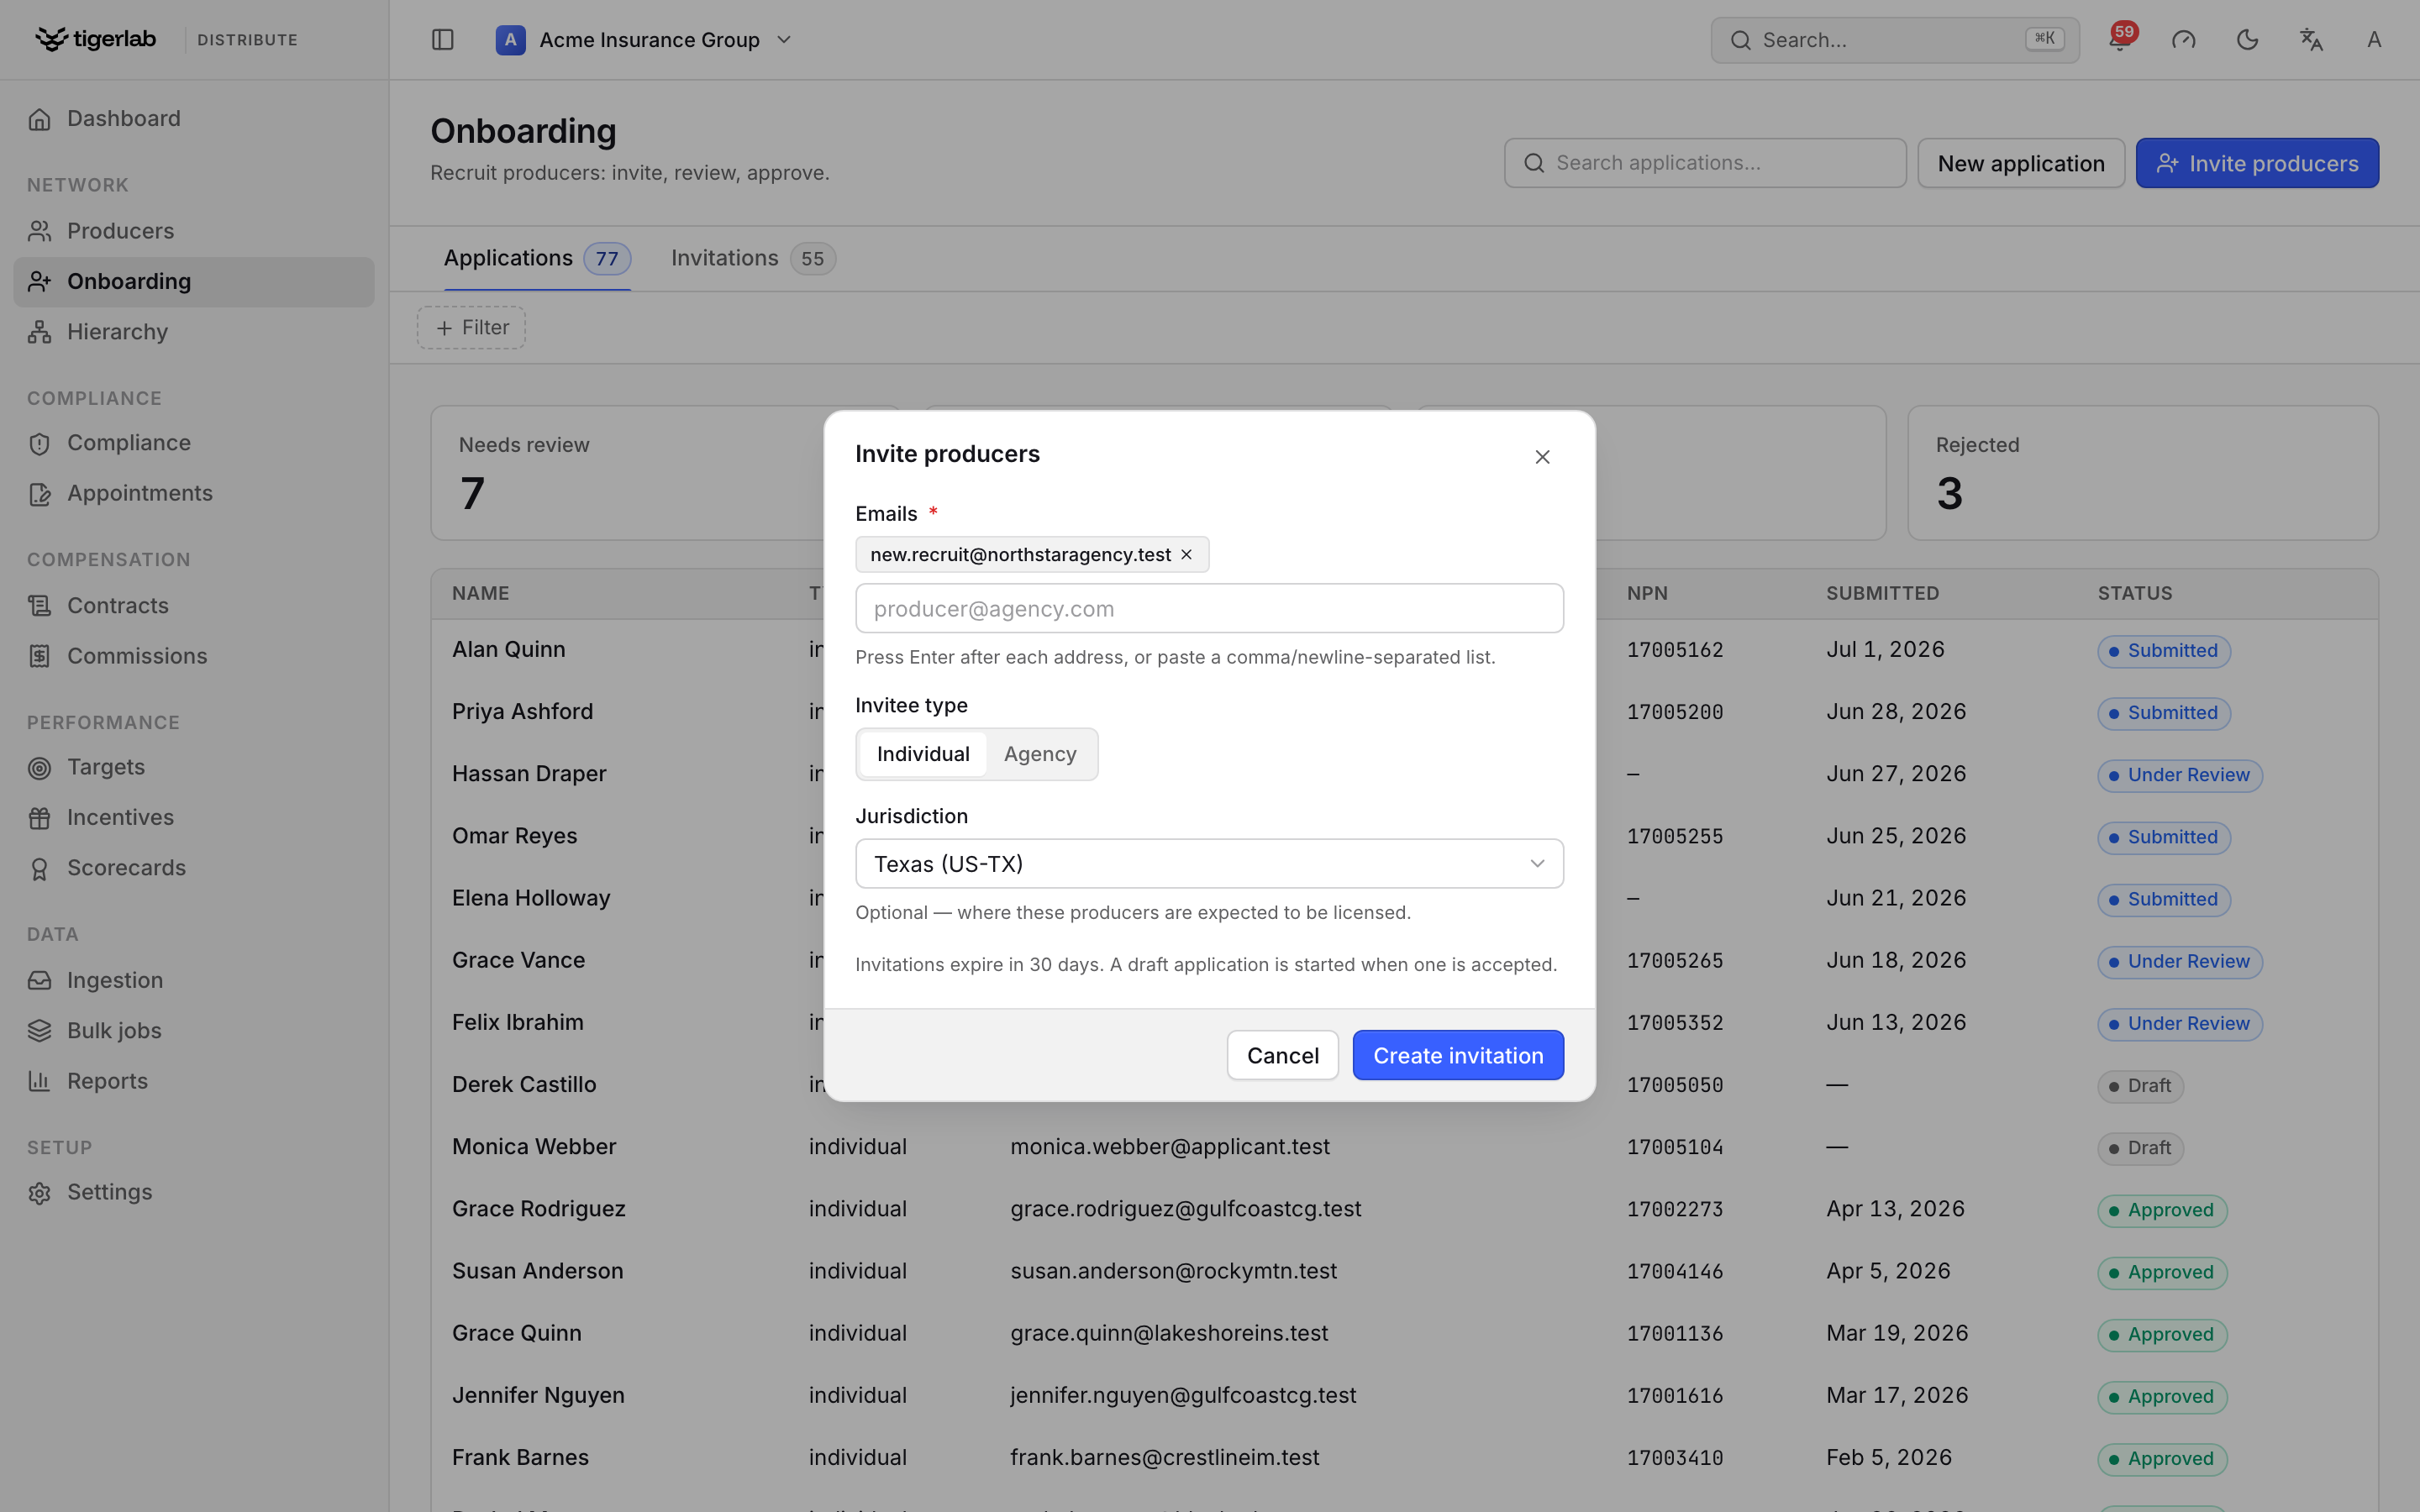
The Invite producers dialog. Each address you type (then press Enter) becomes a chip; set the invitee type and, optionally, the jurisdiction, then Create invitation.
Inviting many at once is a bulk job: addresses are validated first, and duplicates, already-invited addresses and emails belonging to existing producers are skipped rather than double-invited (Bulk operations).
Each invitation appears in the Invitations table with status pending and expires after 30 days. When the invitee accepts, the status becomes accepted and a draft application is started automatically, pre-filled from the invitation.
Invitation statuses: pending → accepted (invitee accepted), revoked (you withdrew it) or expired (30 days passed).
To withdraw an invitation, click Revoke on its row. Revoking is only possible while the invitation is still pending. To nudge non-responders, select rows on the Invitations tab and click Send reminders — invitations reminded in the last 72 hours, and expired ones, are skipped automatically.
Step 2 — Complete the application
An application can be created two ways: automatically when an invitation is accepted, or manually via New application (for example when you are entering details on the applicant’s behalf).
Click a draft application row (or New application) to open the application form. The form adapts to the entity type:
- Applicant
Type (Individual / Agency), Display name (the only field required to save), Legal name (agencies) or First name / Last name (individuals), Email, Phone, Years in industry.
- Address
Street address, City / locality, Region / administrative area, Postal code, Country (two-letter ISO code, e.g.
US).- Licensing
NPN (national producer number; for agencies, the business-entity NPN), License number, License jurisdiction.
Note
A license record is created on approval only when both the license number and the jurisdiction are provided.
- E&O coverage
Carrier, Policy number, Coverage amount, Expiration date. An E&O coverage record is created on approval when a policy number is provided.
- Attestation
A checkbox confirming that “the applicant attests that the information provided is accurate and complete.”
Supporting documents (W-9 / tax form, business entity papers, government ID, E&O certificate, other) can be attached to the application.
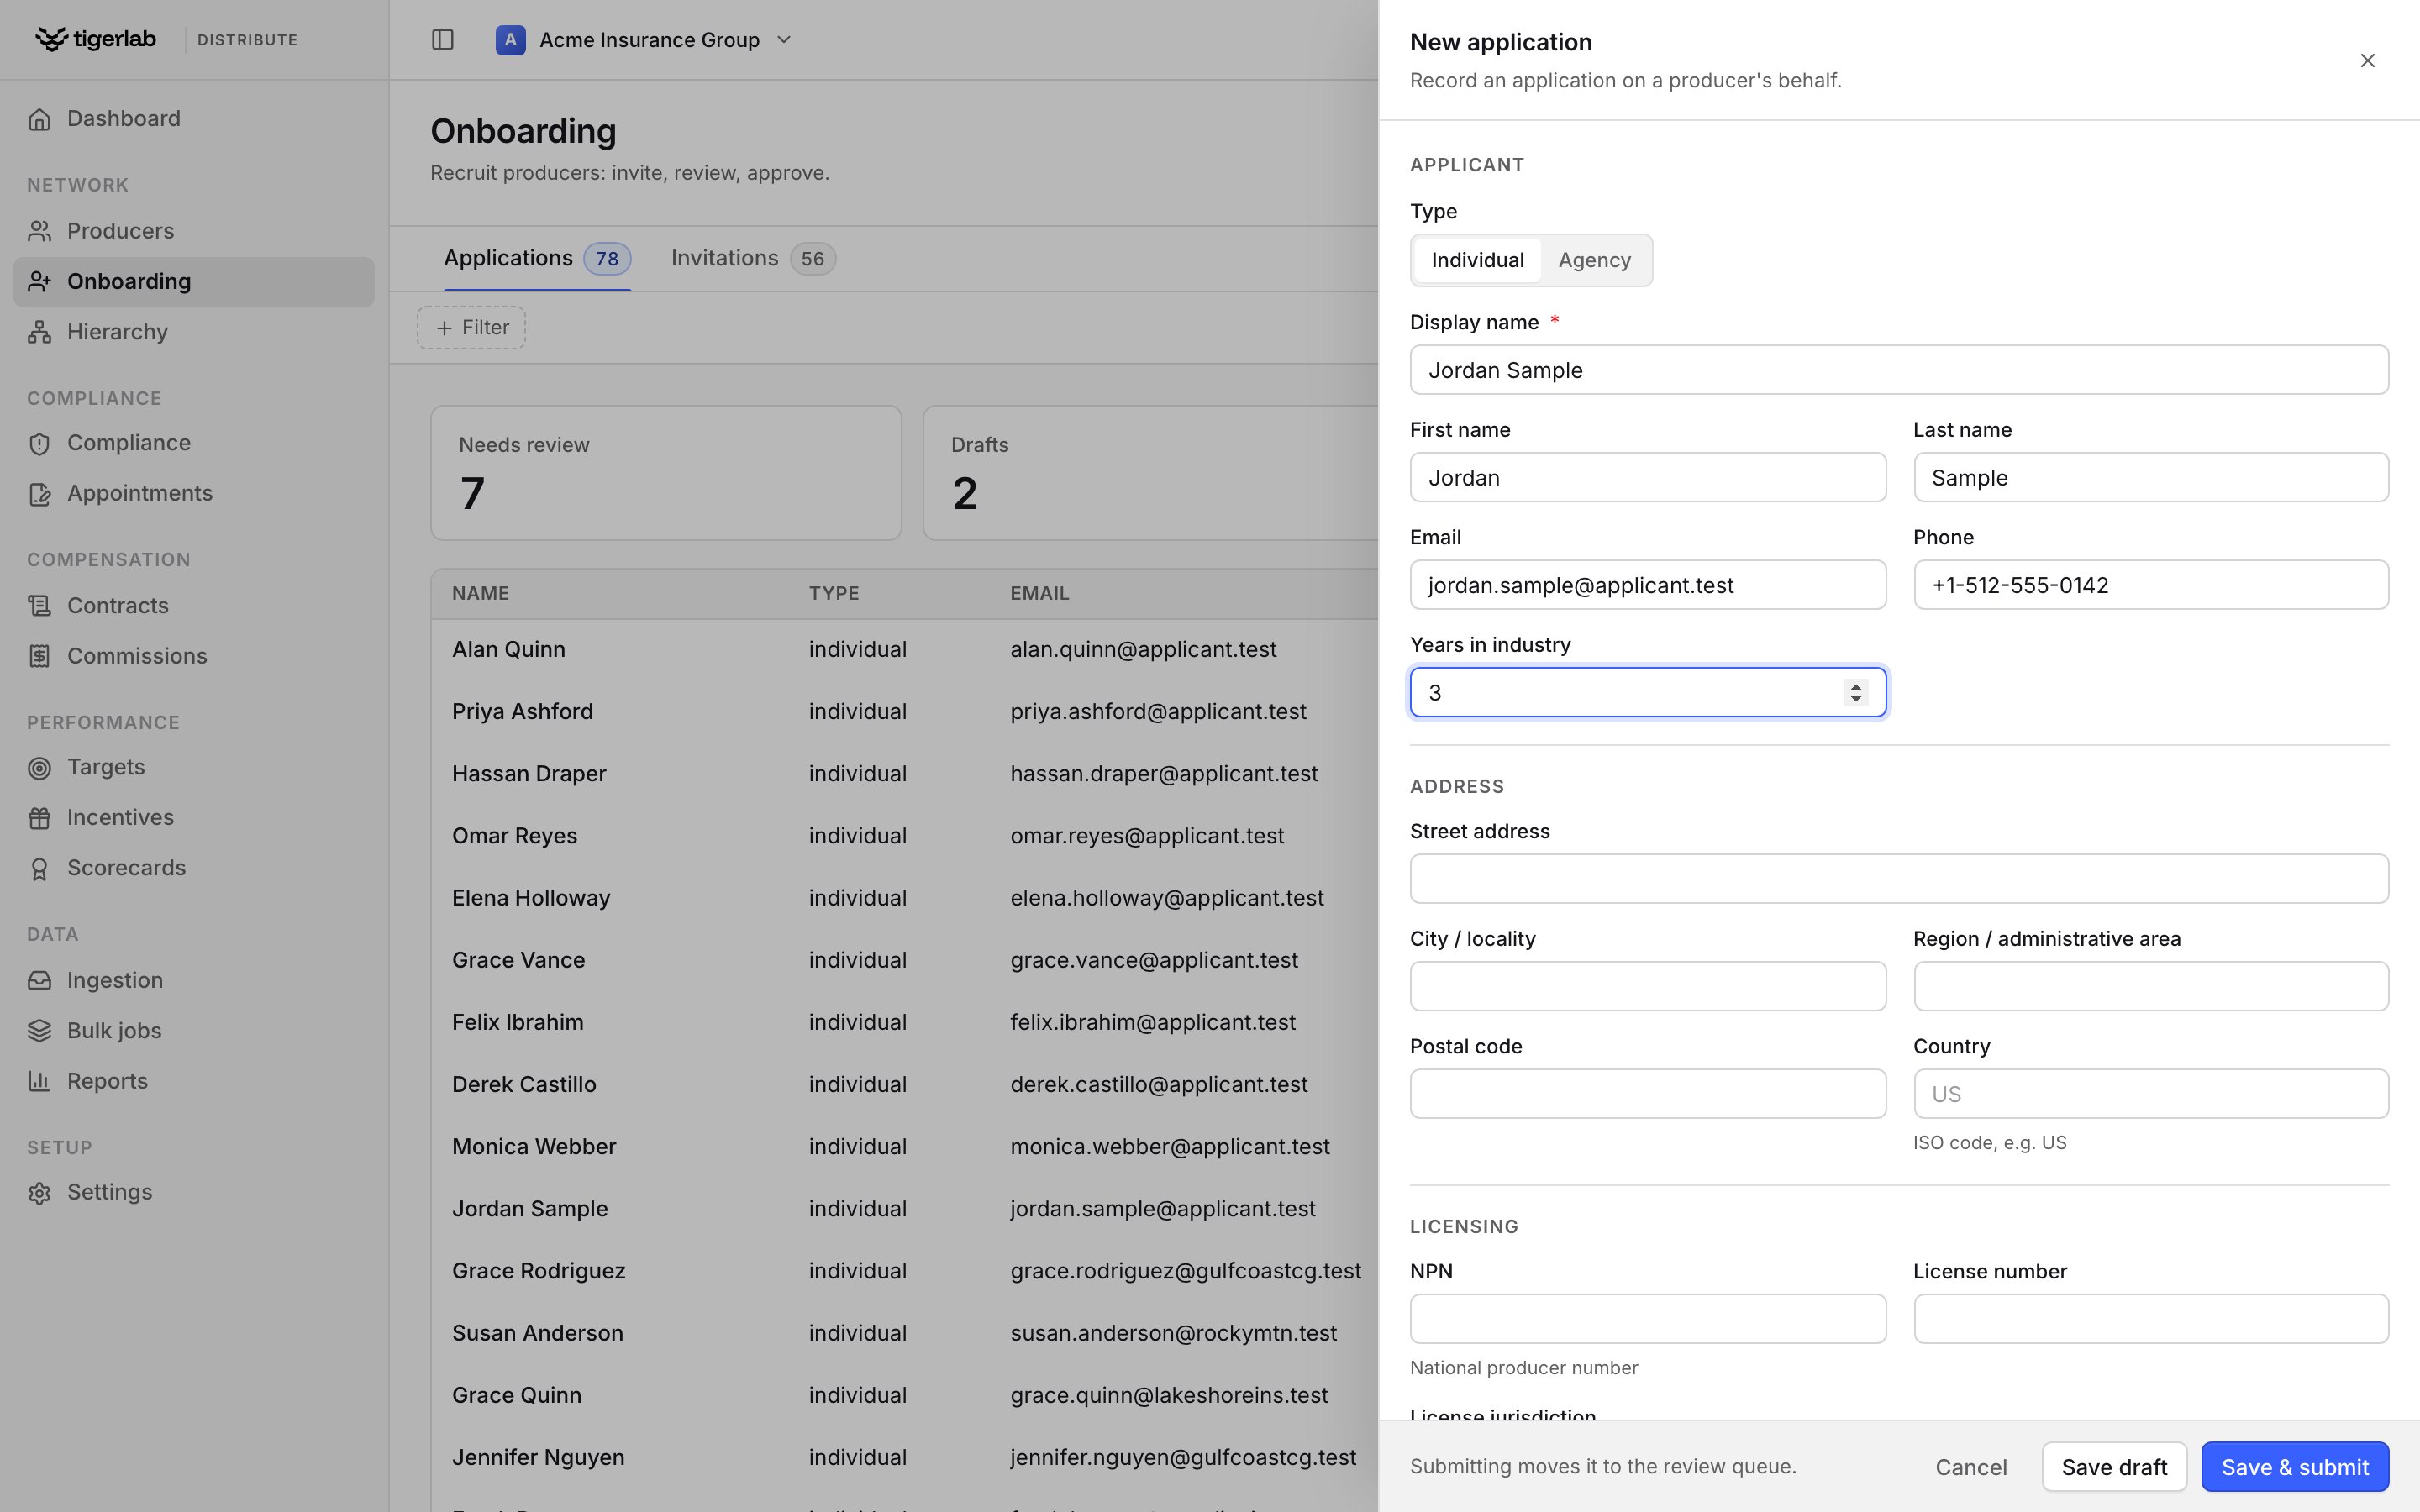
The New application form slides in as a drawer. Only Display name is required to save; the address, licensing, E&O and attestation sections follow below.
Finish with one of:
Save draft — keeps the application editable in draft.
Save & submit — saves and immediately moves it to submitted, putting it in the review queue. A toast confirms “〈name〉 submitted for review”, and your managers are notified in-app that a new application is waiting.
Note
Only a draft application can be submitted. Once submitted it can no longer be edited — it is reviewed, then approved or rejected.
Step 3 — Review the application
Click any non-draft application to open its detail page. It opens at its own URL, with a breadcrumb back to Onboarding, and shows a status summary plus every section of the application, the attestation state (a warning banner appears if accuracy was not attested) and — for rejected applications — the rejection reason.
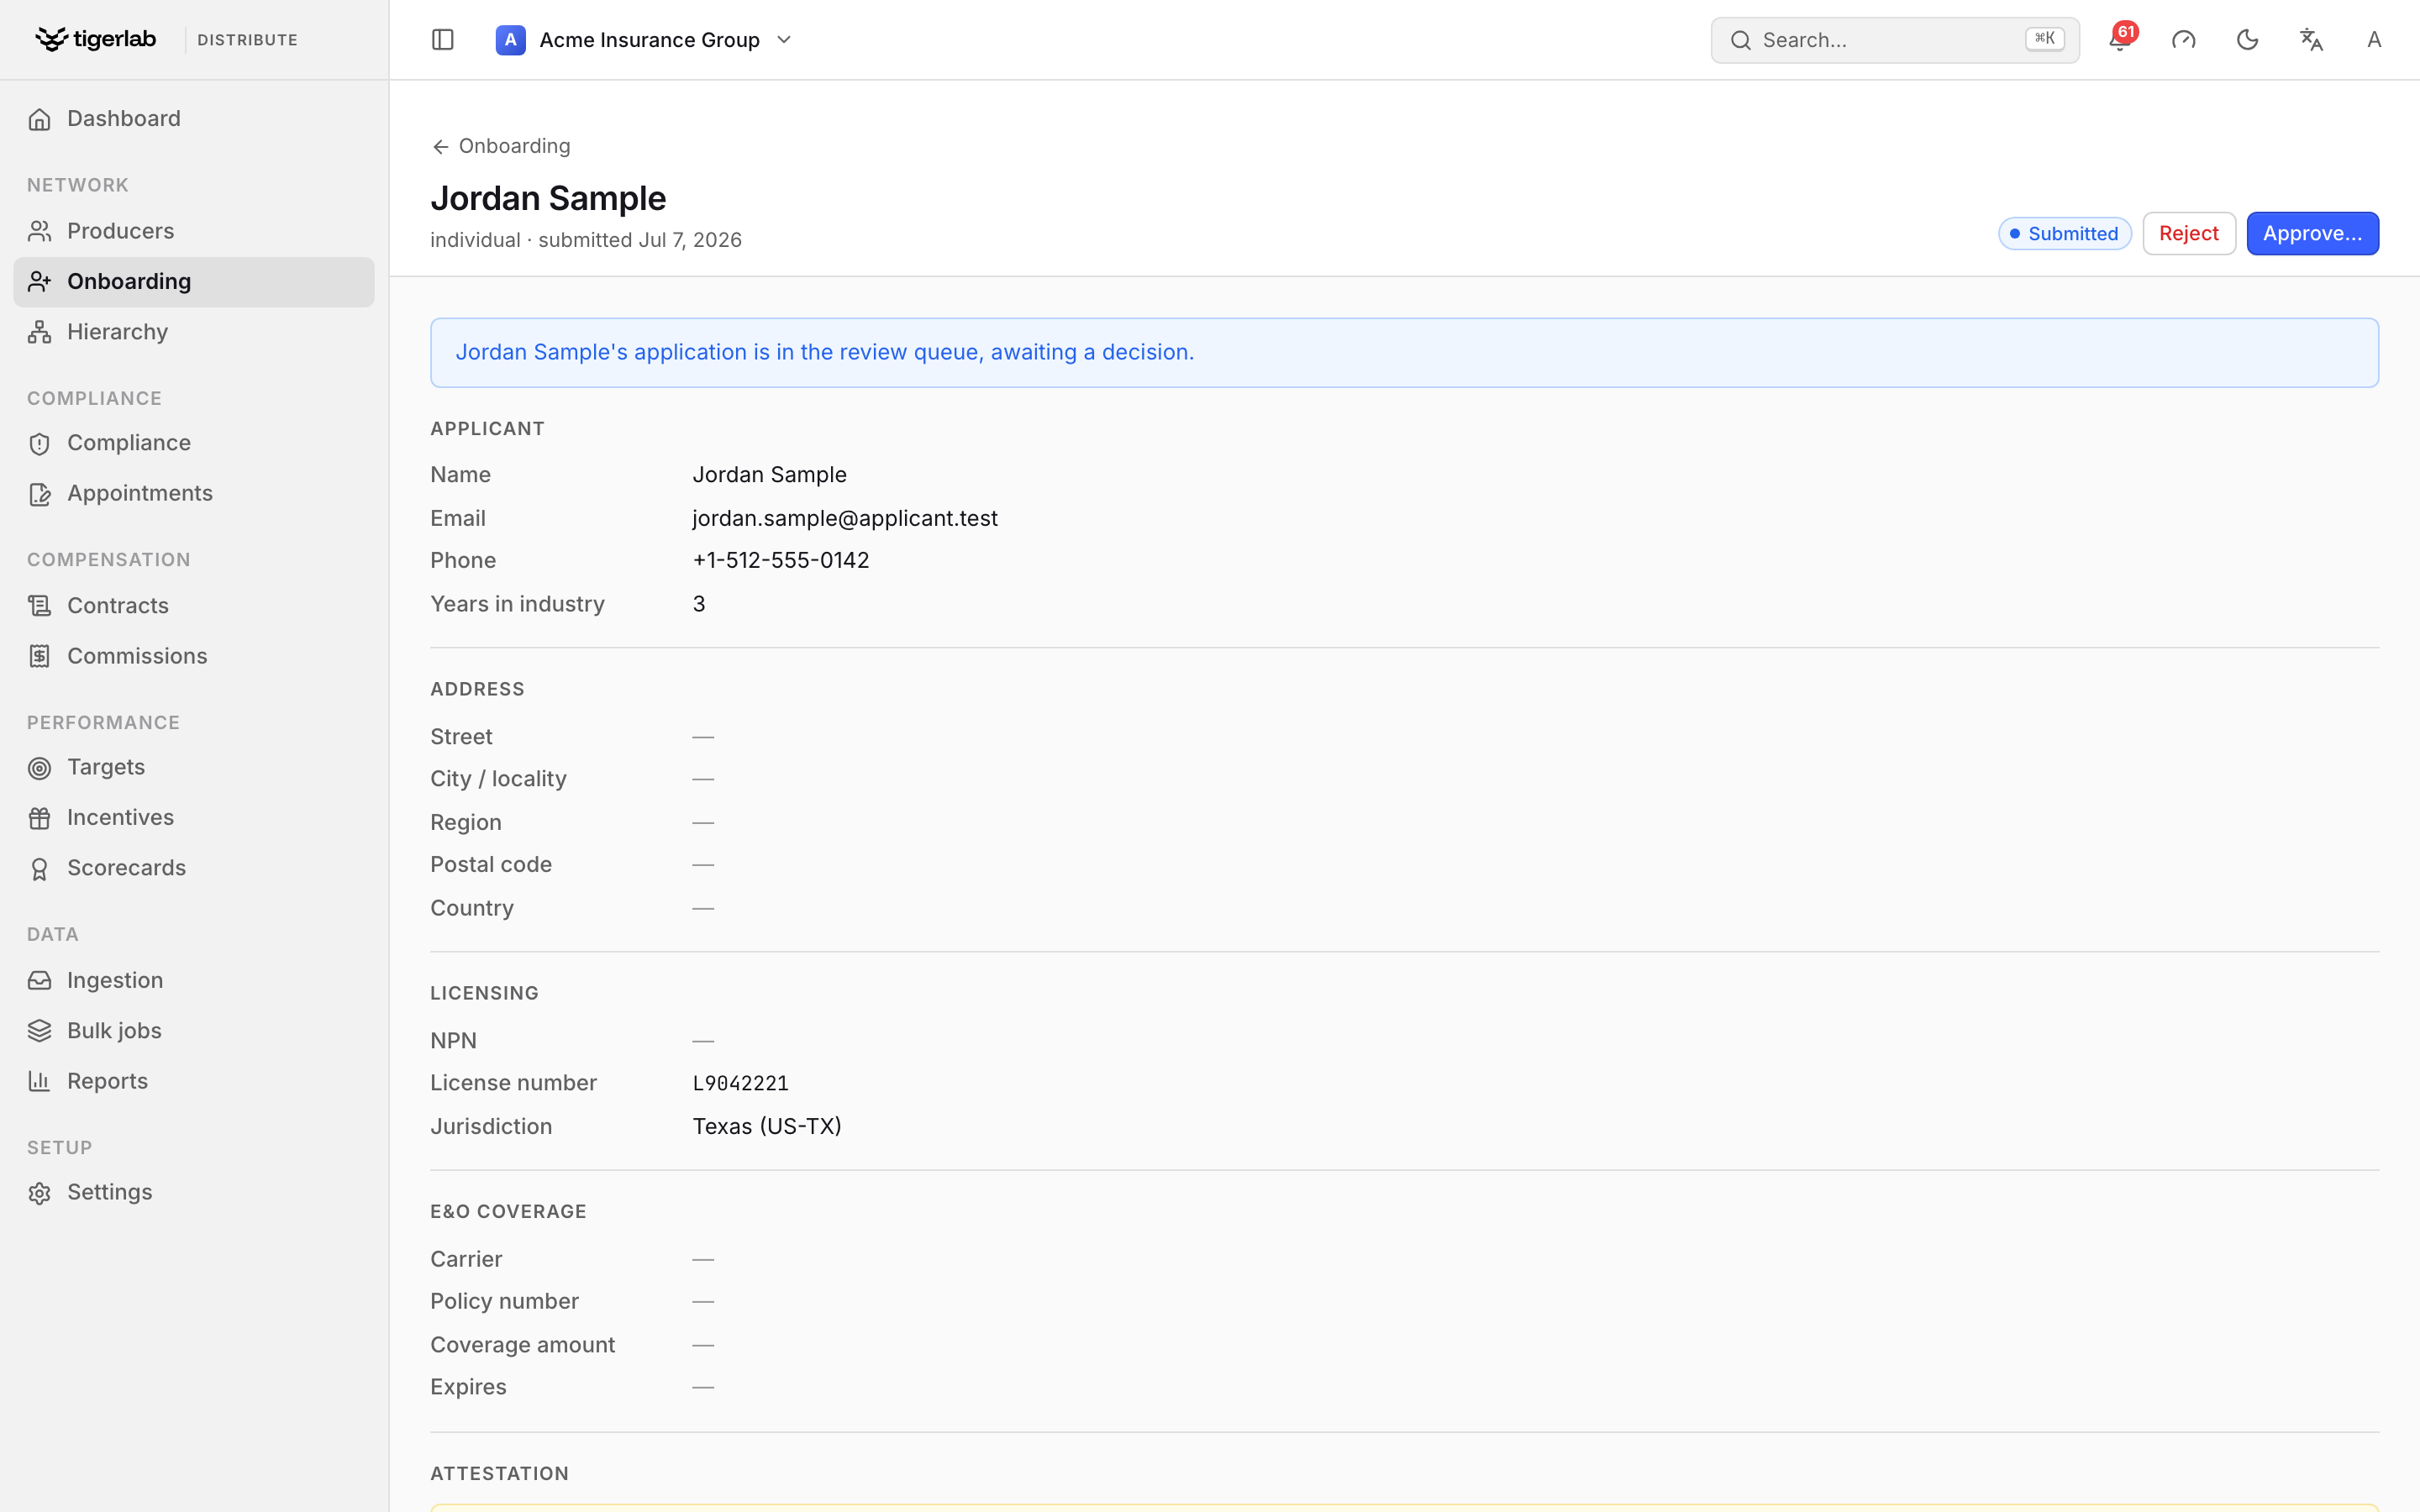
A submitted application in the review queue. The header carries the status pill and the Reject / Approve… actions; the body shows every section captured on the application.
Applications with status submitted or under review offer two actions in the page header, with the note “Approving creates the producer record.”:
- Approve
Click Approve…. An inline “Approve 〈name〉?” summary opens on the page and lists exactly what will be provisioned:
an active producer record of the application’s entity type, with the applicant’s names, email, phone and NPN, and a start date of today;
a license, if both license number and jurisdiction were supplied;
an E&O coverage, if a policy number was supplied;
a commission plan assignment, if your tenant has an onboarding-default plan (Commissions: plans, statements, splits & payouts) — effective from the approval date.
Approval can also provision the producer’s portal access in the same step (The producer portal).
Confirm with Approve & provision. The application becomes approved and links to the new producer — the page now offers View producer →. An outbound producer onboarded event is also published to your webhook subscribers (see Integrations: PAS data & webhooks).
- Reject
Click Reject, enter the Reason (required) inline on the page and confirm with Reject application. The application becomes rejected and the reason is displayed on the application’s detail page.
Note
Approve and reject are only available while the application is submitted or under review; attempting anything else is refused (for example “Cannot approve an application with status ‘Draft’.”).
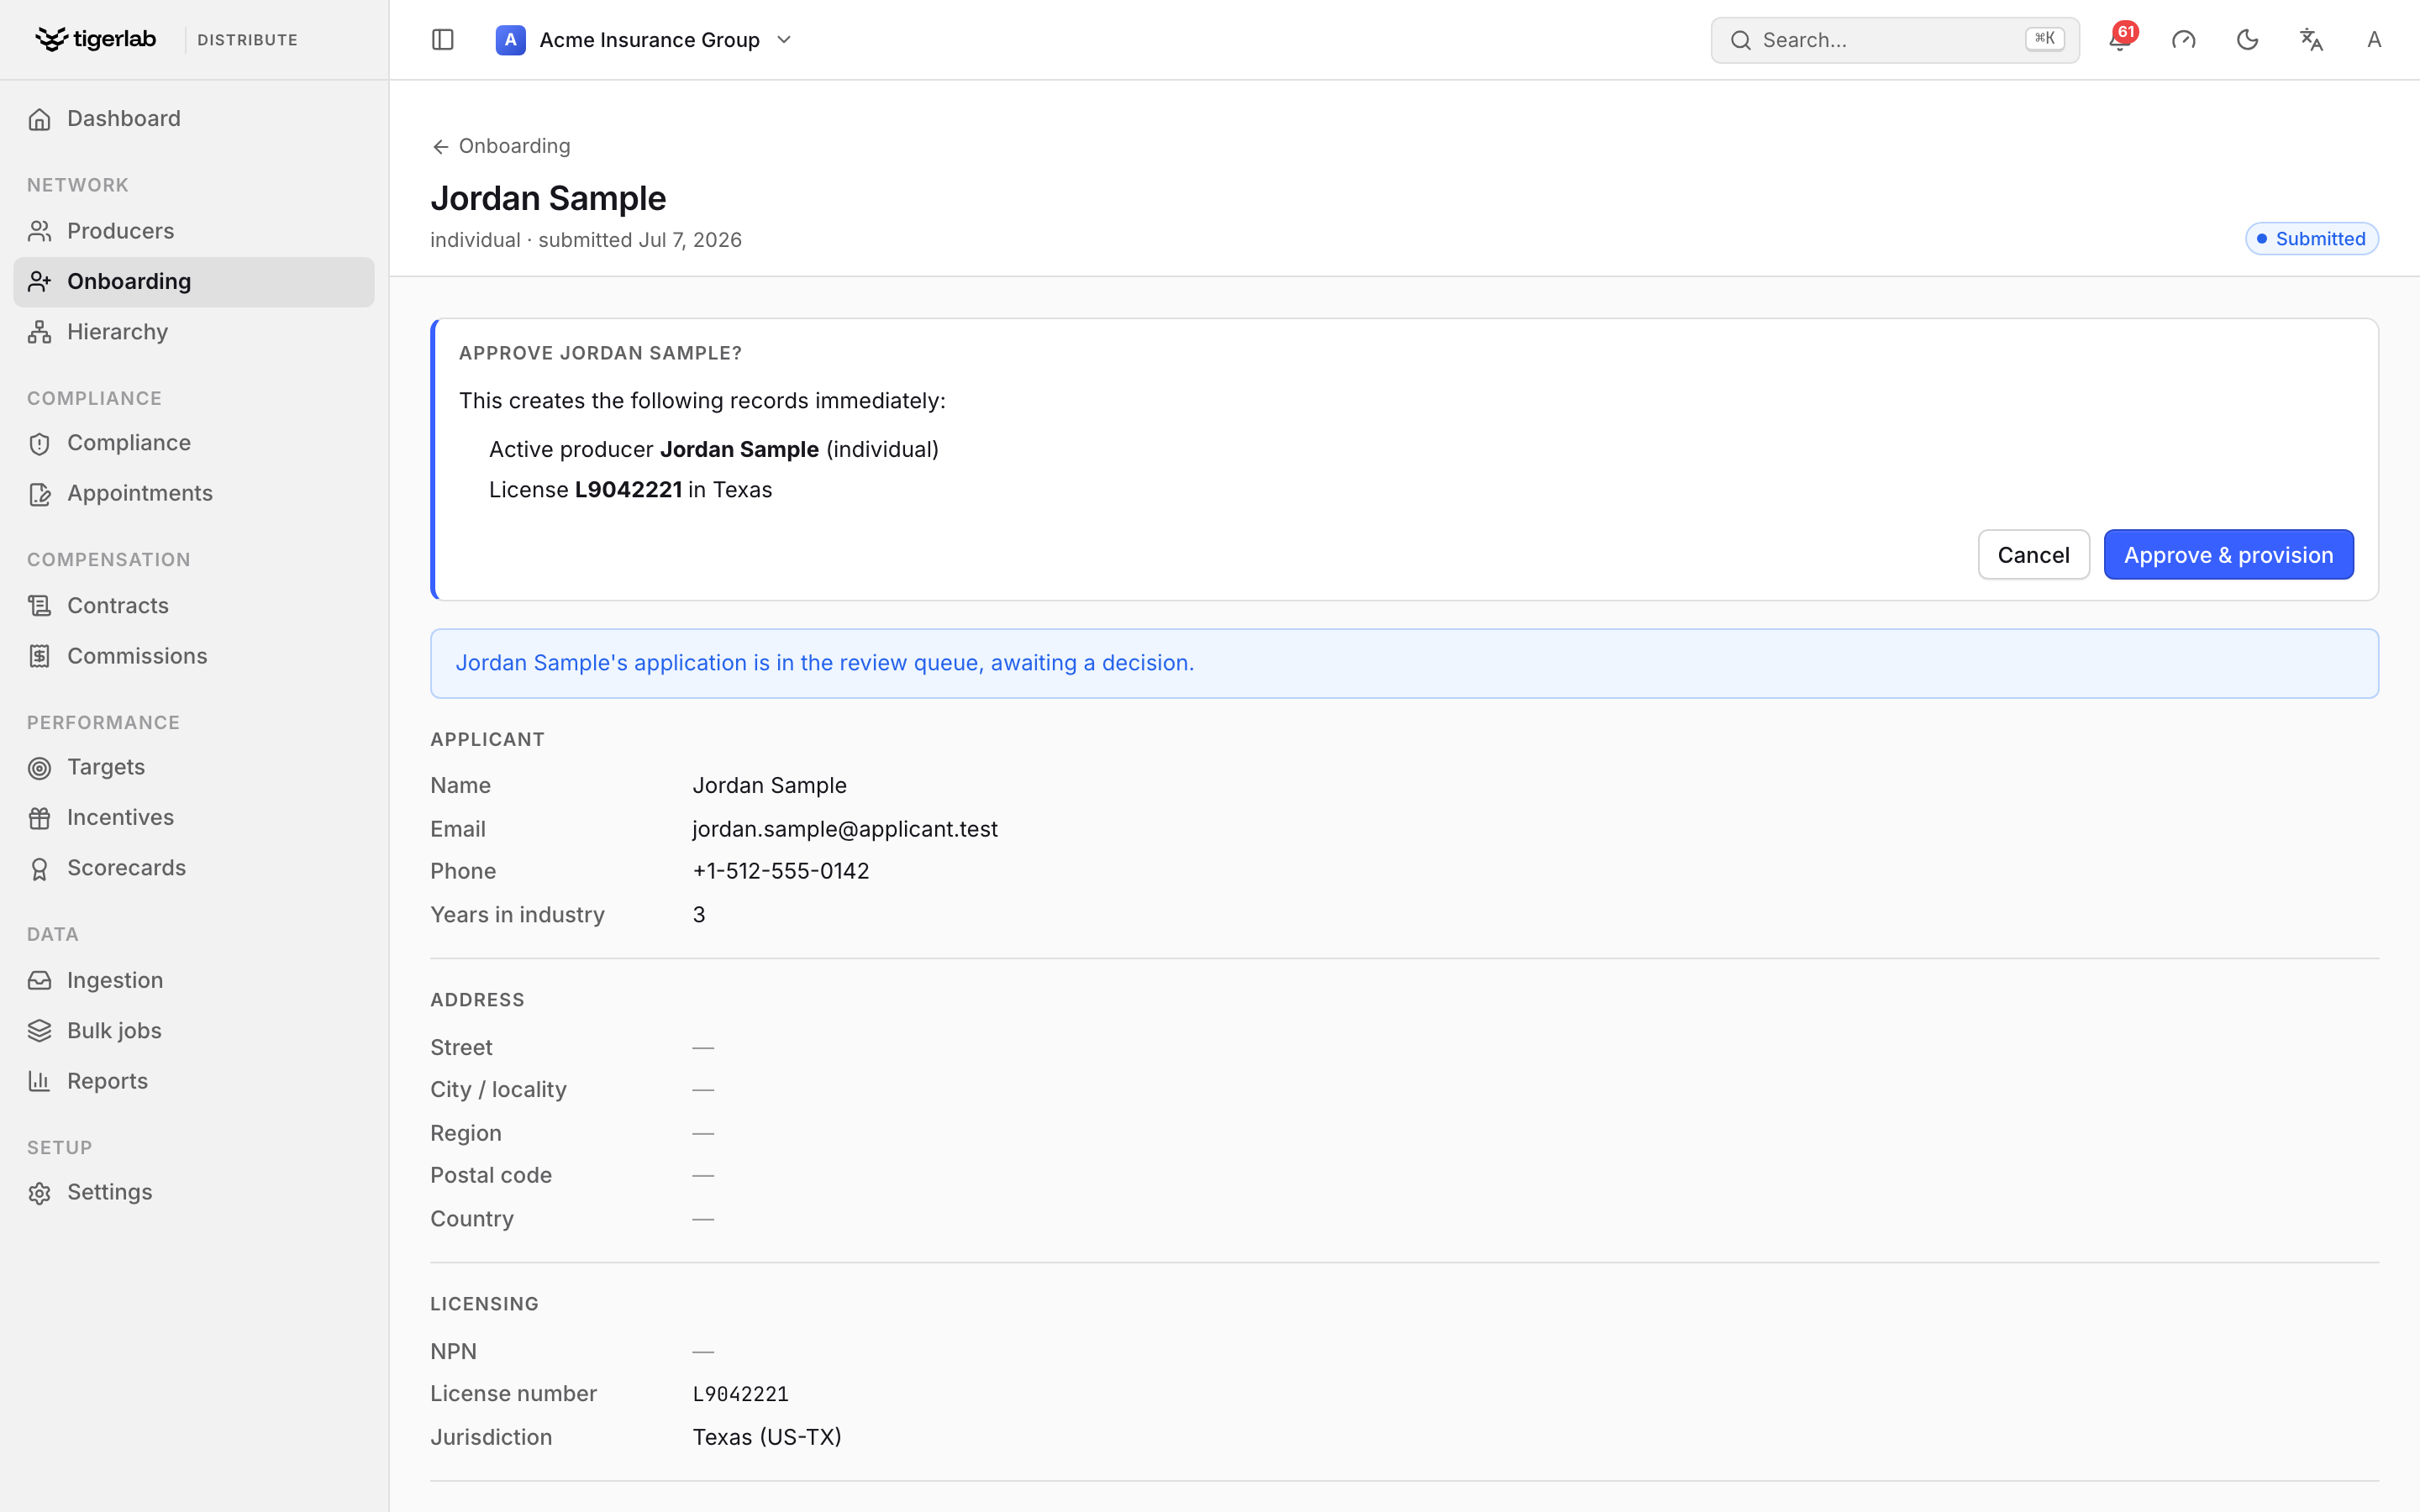
Clicking Approve… opens an inline confirmation that spells out exactly what will be provisioned before you commit with Approve & provision.
After approval
The new producer appears in the Producers directory with status active. Typical next steps:
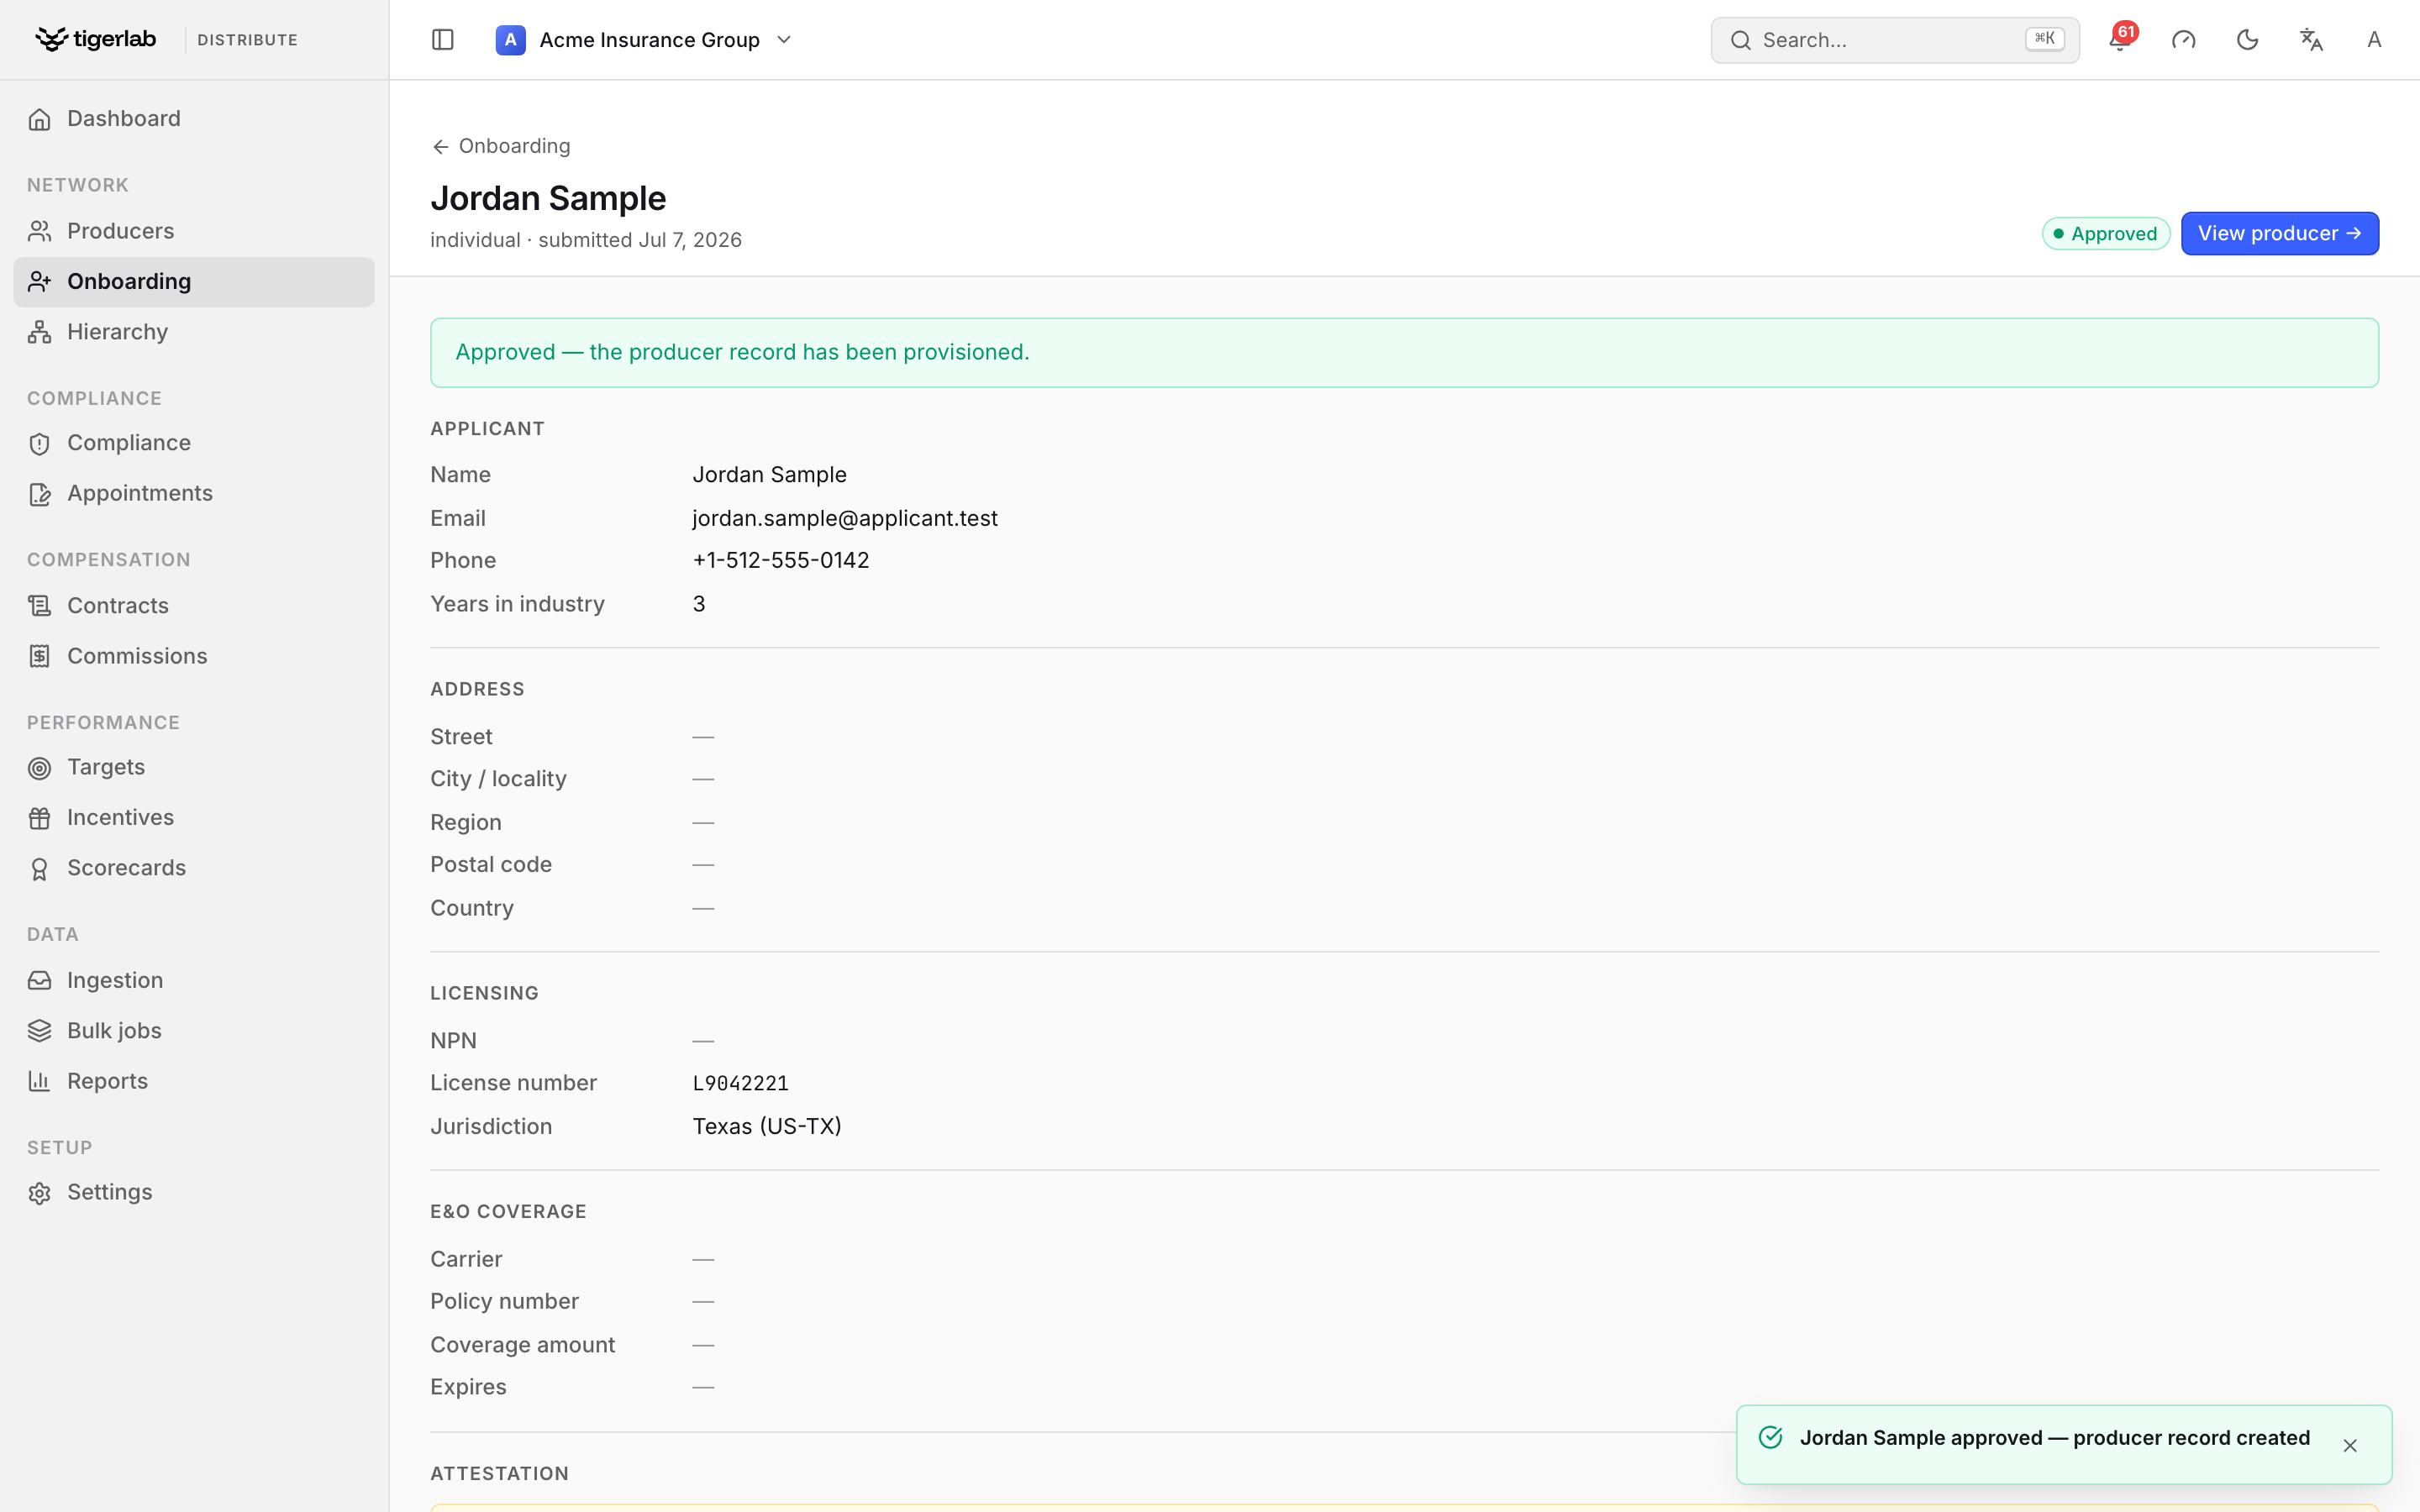
After Approve & provision the application flips to approved, confirms “the producer record has been provisioned” and offers View producer → to jump straight to the new record.
File their appointments (Appointments).
Send their contract for e-signature (Contracts & e-signature).
Add product authorisations and check market access (Managing producers).
Place them in the hierarchy under their upline (Distribution hierarchy).